Thursday, January 31, 2013

One Little Word and a Color Challenge

With the lack of snow here in Colorado, though we did get a nice two or three inches on Tuesday, it's dreadfully dull and brown.  Not even brown, it's grey - totally uninspiring.  I need some color.  This color combo comes from Apron Strings' Color Theory board on Pinterest and it's just the ticket.  It's bright and cheery and almost makes me forget the scenery here is way too drab.


I used this color combo myself to finish up my One Little Word cards (my word this year is Permission) this past weekend; just in time for the February challenge to hit my inbox.  Outside of adding ribbon to the monthly cards, I made four "filler" cards for the remaining pockets in my page protector.  I used paper from the January '11 Smaller than a Breadbox kit - the October Afternoon Sidewalks line.  I'm anticipating using the remainder of the kit over the course of the year on this project, but I'm not tied to a cohesive look, but I'll just see where it goes.  I added buttons, American Crafts glitter buttons (I love their glitter buttons!)  The combination makes me happy.  


Happy Thursday,

Wednesday, January 30, 2013

Organize It - Part Six

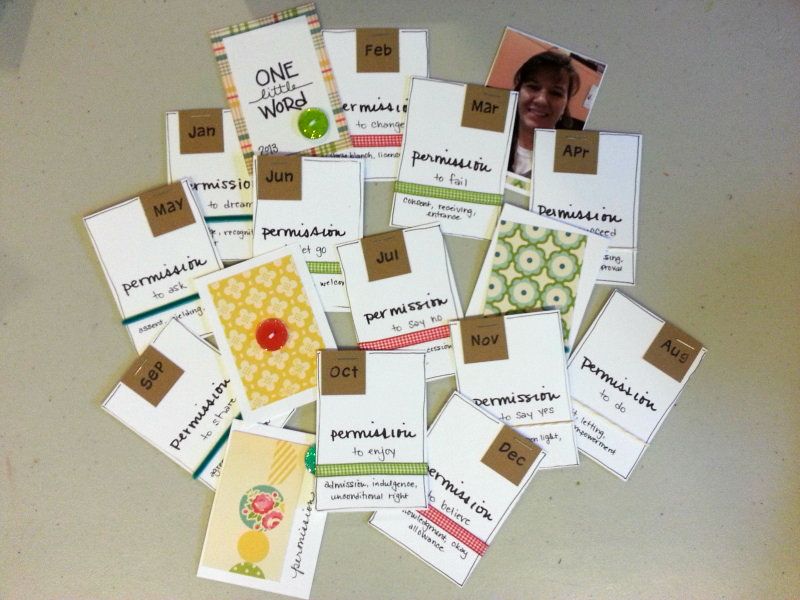
It's time to get down to the nitty-gritty of it all.  The flights-of-fancy, the impulse purchases, the bane (sometimes) of our scrapbooking worlds - I'm talking Products.

First, you need to admit to yourself that you possess products that no longer work for you.  They no longer inspire you.  Maybe they never did.  And you know what?  Both scenarios - the products that have lost that loving feeling and products that never had it - are okay, so long as you are okay with letting them go.

Determine what you have that works. . .and what doesn't - that includes any current system(s) you may have in place.  No point in messing with something that works.  Be honest with yourself - yes, you spent money on the items, but if they're not inspiring you, it's perfectly okay to let them go.  If all they do is bog down your selections when you do sit down to work - let them go.  If you consistently pass over them - let them go.  Keep the items that speak to you.  That get you excited to create.  And this includes organizing methods you already have that are working.

Knowing how you work and how you think about your work, it's time to think about how you're going to organize the items you're keeping:

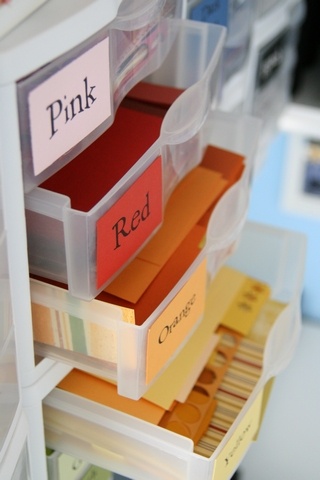
  • Color - if you think in terms of colors, maybe sorting all your items by color will speed up your process and keep you motivated.  Putting all your blue buttons, brads, ribbons, etc. in one large container may be your ticket.
  • Activity - this method is keeping all items to one activity together.  Maybe you have a station for all your stamps, ink pads, etc. on specific shelves, or occupying a specific space.  Maybe you have a cutting station where all your punches, trimmers and diecuts live.
  • Manufacturer - if when you sit down you think, "Basic Grey has a great line for this," or you reach for your favorite manufacturer every time, or maybe you buy full lines of products, then sorting in this way could work for you.  Keep all the items from a given manufacturer in one container.
  • Topic - this is sorting and storing by themes:  seasons, holidays, travel, birthday, masculine, feminine, baby, etc.
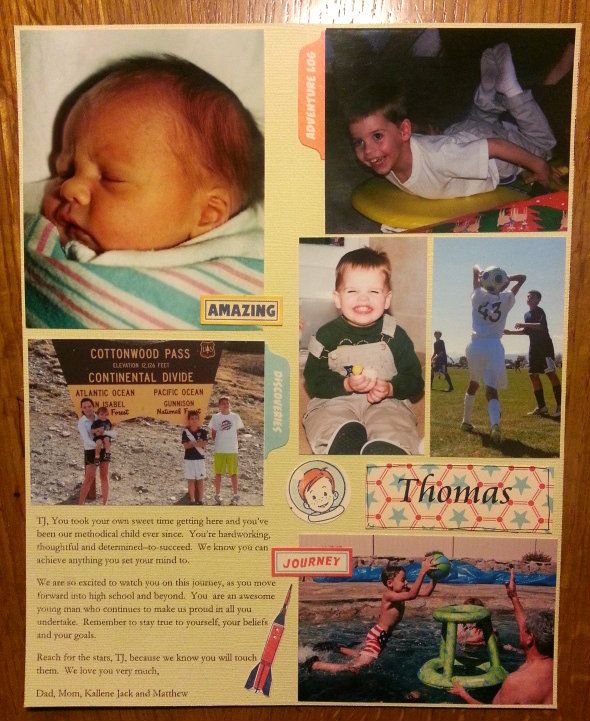
  • Project - taking on Project Life, or your trip do Disney?  Put all the items - paper, stickers, album, special tools or stamps - you think you want to use in a container sorted by these projects.

Sort and purge.  Yep, it's that time. This is why before you began this process you identified people or places to send off the products that are outdated or uninspiring (to you - which doesn't mean they won't be perfect for someone else).  LET GO!

Store and, if you want, display - this goes back to what sort of personality you have as a crafter.  See this POST.  After purging and organizing, this is my favorite part.  Now remember, if you have storage or systems that are working, keep using them.  Don't complicate it.

  • Hooks - If you're a Visible and Open person this might be the ticket.  Group your items according to the organization method you've chosen and hang on hooks, using rings or dowels.
  • Altered Trays - Trays are big:  printer's trays, artist's trays, even food trays.  They're big and flat or big and compartmentalized.  Change up their look - paint and paper - and sort your goodies away.  Trays can also be portable if you're say working in your kitchen - store the trays in a dedicated cupboard and tote them to your work space.
  • Glass Jars - If your a Closed but Visible crafter, these are great and inexpensive ways to store everything from stamps to buttons.  Mason Jars come in a ton of sizes and are an inexpensive option.  Save your jelly jars.  Shop thrift stores.  Upcycle away.

  • Lidded Boxes - whether they are see-through or not.  Lids protect contents from spilling out (when such a thing would be uninspiring to your creativity) as well as protecting your goodies from dust and light.  

How this works for me:

I use a couple different methods depending on the product.  I've already said I'm a Visible and Closed container person - so jars work for me when sorting my small embellishments:  buttons, brads and ribbon are by color.  Then like items are sorted:  photo corners, florals, pins, chipboard letters.  Sometimes I wonder if I should sort all my embellishments by color, no matter what they are.  I may try it and see how it goes, but right now this works for me.

My paper is pretty much all in kits, which are stored by themes - so seasonal, holiday, travel, etc.  I do have two favorite manufacturers and those items are sorted that way - anything October Afternoon is all in one place, papers, embellishments, stickers, etc.  

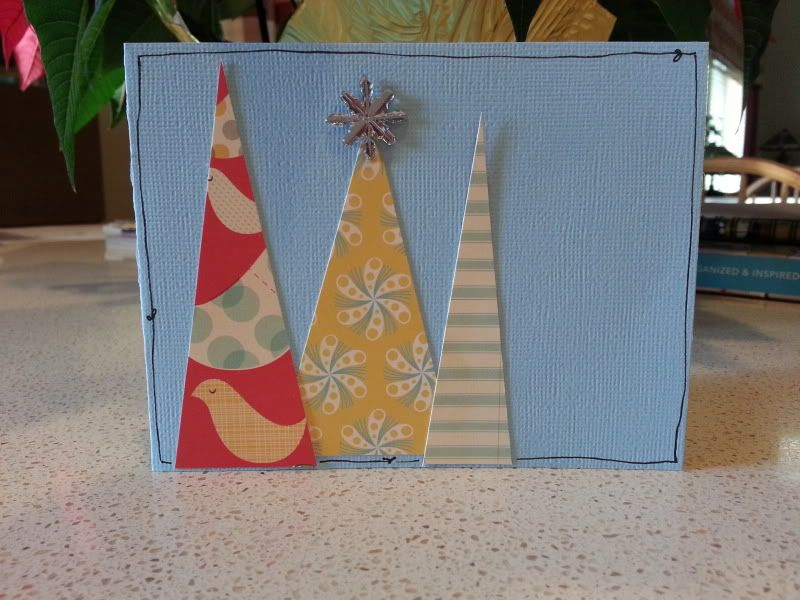
When I can eek out no more from a kit, I've created all the layouts I can and made all the cards from the scraps, I sort out any leftover embellishment accordingly and toss the rest of the paper - this does not inlcude a full sheet or paper bigger than 6x12, those go in the giveaway box.  I do not keep scraps.  They don't work for me.  I don't think of them.  They clutter my space.  Away they go.  

Every so often I'll create a layout with a kit and I'm just not feelin' it with the papers enough to create anything further from them.  When this happens, the remainder of the papers goes in the giveaway box to the kids' schools.  

My stamping products (stamps, ink, tools, etc.) are all stored in one cupboard - behind closed doors.  My Cricut sits on the window sill.  Pens, pencils, everyday reaches are stored in a caddy.


As with all the posts in this series the ideas presents are inspired by "The Organized and Inspired Scrapbooker" by Wendy Smedley and Aby Garvy

Happy Wednesday,

Tuesday, January 29, 2013

Project Life - Week 4

It turned out to be a pleasant weekend.  Weather was nice.  I don't recall bickering children, though I'm sure it happened.  And I got to spend time doing what I had planned - always nice.  I also realized that two deadlines for my son loomed: one his yearbook dedication page and two his photos for his poster. 

My son is an 8th grader this year and will be "graduating" in May, after nine years spent with his classmates in the same school.  The school does several nice things to make the final year for these students special.  One being dedication pages in the yearbook, created by their families.  The other is 8th grade posters - not created by their families but of volunteers - hurray for the volunteers!  These two projects meant that I had to spend time going through mountains of prints and digital files looking for a handful of photos that showcased my son's life.  Too many photos.  Too many memories to narrow down to 20-25 that would encapsulate his life.  But, I got the first of two complete - six photos and a note to him scrapbook style for the yearbook.


Beside those two projects, I managed to upload all my 2011 photos to await a sale to get them printed.  I completed my One Little Word cards.  Created another couple pages in my December Daily album. And Week 3 in Project Life.  Another kit used, well, partially this time - Bigger than a Breadbox January '12 - some Studio Calico.  I won't be making cards as there's enough left from that kit to create another layout, and then I'll create cards - though I have more cards to share from Week 2's scraps later this week, too.  

I'm enjoying just snagging the odd photos.  This week saw hubby's birthday, and a gift enrolling him in the "argyle club."  Sun spots in the yard for a dog who is usually more interested in hunting down some varmint - our bassets used to live for yard sun spots.  Two sick days for my 12 year old.  Enrolling in my next two knitting adventures classes - socks and a sweater.  (Yikes, look out!)  Cleaning the family room carpets.  Late night pick-ups.  The arrival of "one of the best gifts I've gotten in a long time," my husband's throw-back Colorado Rockies jersey - the hockey team.  A couple photo projects that led to the sorting and subsequent cleaning out of a basket of scrapbooked photos - what a mess.  I need a system here.  The tree is down!  The tree is down!  Big dogs and their tangle of legs; it's still hard to get used to when you've had squat-legged, long-eared bassets.


Happy this-should-have-been-Monday's-post Tuesday!

Friday, January 25, 2013

Project Life - Week 3 and a Recipe

I finally got to a point where it felt like I could reward myself with some "me" time.  It was unfortunate that it was at like 10:30 last night, but hey, I'm not really good with daylight scrapbooking anyway.  What that means is that I completed the cards I wanted to make using scraps from my Week-2 Project Life page and that I completed Week 3.  Yeah me!

Here are the cards, using the scraps of a past Apron Strings kit - I'm pretty sure it was December 2010's papers.  I went back to the Big Picture Class I took last year, "28 Cards in 28 Days" and just started with the first handout.  And as I'm uploading them I'm realizing I totally missed incorporating any stamps - my 2013 challenge that goes with My Creative Classroom's FREE "Use Every Stamp" class.  Oh, well, there's more scraps on my table to use with stamps!


And now, finally, Week 3 is complete and in the book.  I'm enjoying the process.  I'm snapping photos of whatever strikes me with my phone.  This week it was documenting my attempt at making my own tortillas, finishing my first book of the year, the start of spring soccer, learning pinochle (a totally frustrating experience!), my daughter's thrill that the NHL was back, and my 4 y.o.'s personal task to write his name on any surface he can find.  And, yes, the two walks I took last week.  Still keeping it very simple and I think I'm going to look for some three-up divided page protectors the next time I'm at Archiver's.


My hope is to give myself a little Permission (ah, there's that One Little Word) to do a little more creative work this weekend.  I have to finish my OLW cards, as the end of the month draws near.  The inspiration for what to do struck while I was tidying bedrooms, so I just need to sit and do it.

And just one last thing. . .if you're looking for something yummy for, oh, a snack while you yourself are creatively playing, or maybe Sunday breakfast, this is your recipe.  It's pinned on Apron Strings' I Can Cook That that board via SweetPeasKitchen.com.  I made it this week and have been adjusting what I'm eating to make room for this one!  The syrup and glaze give it a fresh, tart flavor that would make it an awesome dessert in the summer.  I used fresh blueberries that are on the brink of bursting and the bread is super moist. . .so much so that I will adjust my bake time next go round.


Happy Friday!

Thursday, January 24, 2013

Organize It - Part Five

This post and yesterday's really go hand-in-hand, but I was long winded enough yesterday, so I figured I'd just break it into two posts.  Again, the inspiration from this series comes from "The Organized and Inspired Scrapbooker" by Wendy Smedley and Aby Garvey.

I'm sure we all collect it.  Pinned it to our bullet boards as teenagers, stuffed it into hope chests or shoeboxes as young adults and crammed it into box after box as new parents.  I'm talking of memorabilia.  Those little bits, bobbles and pieces of our lives:  tickets, cards, notes, scraps of fabric, flower petals, corks and the glittered creations our kids bring home.

To tackle it start by determining what memorabilia means to you and your scrapbooking.  Maybe you'll display pieces.  Maybe you'll have a good system for photographing all the pieces and including them with layouts.  Maybe you'll have a whole book dedicated to it.  Or maybe you'll determine to just box it.

Once you know what you're going to do with it, you'll need a way to store it:

  • Long term storage - even if you're too close to certain types of memorabilia to sort and perhaps purge, you can still get it organized.  Sort items into large categories like high school, pre-marriage, per child, etc.  Look for boxes/containers that are sturdy and water/humidity resistant depending on where your storage space is; basements flood or are subject to higher humidity but sometimes that's the only storage available in your home (like here in Colorado, attics reach well into the 100's in the summer).  If so, protect your items accordingly.  Put highly valuable items in fire proof storage.
  • Copy your photo systems - if you're intending to include memorabilia in your scrapbooks, the easiest way to store the pieces is to follow the same categories you have for your photos.  
  • Rotating system - there are some items that are just special, that maybe you've determined you want to see regularly.  Including these items in your home decor is certainly a way to do that.  Maybe you pull items out seasonally, in which case you'd want to store and label accordingly.  Maybe there are those shadow-box items you've been meaning to deal with. . .now's the time to pull them together and just do it.
You know what's next - organize it and purge it down.  Sometimes some distance in determining what to let go of is key. . .if this is you, don't try to pare down right now.  However, if you're ready to dig in and let go, determine what's important - do you have several pieces of artwork that reflect the same time period in your child's life?  Select certain pieces that cover a range of time - or show their growth.  Scaling down your memorabilia is not only freeing, it lets you appreciate what you do keep.

Now, show that stuff off.  Put notes with your photos to remember the memorabilia you've set aside.  For small collections think about glass jars.  For those love notes from both hubby and kiddos, tuck them into little baskets - maybe bundle them up with pretty ribbon or twine.  Rotate kids' artwork on over sized clipboards, or a special "frame" on the 'fridge.  Small cork-boards or magnetic surfaces make it easy to display and rotate any number of items.  Group items on shelves in your room, or your kids' rooms.

How this works for me:

I'm horrible at including memorabilia of any kind into scrapbooks.  I have the odd shots of the kids' creations that I included on a page or two, but not enough to call it a habit.  Most of their creations are boxed and stored in the crawl-space.  Put there when the emotional connection was too much to sort and/or toss, and now it just sits there because it's out of my sight.  The sheer volume created by my children when they were young is insane, then you add my own pieces and it's just an avalanche of items.  I'm sure as I work my way through my perpetual calendar's decluttering schedule I'll hit pockets of the stuff and I'll have to deal with it then.  At least I have a plan. . .

I do have a couple systems:  the kids' early school work is all boxed and stored in the crawl space:  art projects, paper work showing their handwriting progression, papers with subjects they struggled in and papers showing where they excelled.  As the volume of items decreased (and I figured out what was important - to me - to keep), I started to keep their pieces in plastic folders and the drawers in my studio space.  Does it need going through. . .'fer sure, totally!  This is just their school work, too.  It's not the stuffed animals they loved when they were little, or the clothing that had special meaning.

I have a few items that I put out, or are out all the time, in my home.  I have a doll from my childhood that sits permanently in my studio.  I have some other dolls that are dressed in holiday attire that come out for that particular holiday.  The thought just occurred to me that two of my children had bunnies that were their constant companions when they were young and it would be fun to include in my Easter-mantle decor.  

A little thought and all those pieces that meant so much to keep will have their time in the spotlight - just think outside the box a little.


Wednesday, January 23, 2013

Organize It - Part Four

You know back in the day of film, photos were limited to how much film you could afford and, subsequently, have developed.  You didn't know if you had a roll of blooper shots or not, so you worked at taking the best shots you could and you thought more about the shots you took.  Nowadays, it's all digital and we snap away with no regard to costs or what we're shooting; if you don't like it you delete it.  But with digital photography how many of us have the discipline to really go through and delete all the bad shots?  How many of us take 100's of photos at a single birthday party or kids' soccer games?  There is something to be said for film. . .if nothing else it was more manageable.  Digital photos can quickly become the nightmare of a scrapbooker, in just shear volume, not to mention storage of the images and the prints.


Today we're looking at organizing our photos.

Taking digital photos shouldn't be any different in thought processes as it was when you shot film.  Be intentional about what you take photos of.  Are the photos you take telling the story you want to tell.  Is the photo you're taking for your scrapbook or wall or maybe something else?  

Organizing your photos, whether the actual prints or the digital images, or both, is probably one of those decisions you'll want to really think about, but only because a major shift in your process could be a big pain in the butt.  Well, it would be if you wanted to affect the change going back to apply to every photo you've ever taken, rather than changing now and moving forward leaving the old system in place.  ANYWAY. . .think about this:  
  • Topic - If you're more of a themed scrapbooker, this method may be your thing.  This idea is more along the lines of Stacy Julian's "Photo Freedom" or "Library of Memories" where your scrapbooks are based on themes like family, each of your children, places you go and so on.  Your photos/images folders would be set up in a similar format, whether you sort your downloaded images into appropriate folders or you sort your printed photos into boxes labeled as such.
  • Project - If you think in terms of projects, or looking at photos makes you think, "Oh, I can make a mini book based on this" then sorting your photos/images based on the project will help you cut the time when you're ready to start.
  • Chronologically - This is probably the easiest of the three methods and the one that may be your ticket if you scrapbook chronologically - not so much what order you create your layouts in, so much as how you store the finished layouts.  This system is simply sort according to year and month.  You can further define it by event, holiday or season, as well.  
Time to do a little organizing and paring down.  As I mentioned at the beginning, if we're shooting digital we snap away willy-nilly and then wonder why we're overwhelmed when we look at the thousands of photos to scrapbook.  It's time to organize and formulate a process.  Start by sorting your photos into whatever method you've chosen to use.  While you're sorting toss (or delete) photos that are blurry, eyes are closed, or you've got 10 of basically the same photo.  If you just can't bear the thought of tossing and/or deleting any, create a cold storage where you place prints you probably won't use, but they aren't in your main system.  I loved this example in, "The Organized and Inspired Scrapbooker" by Wendy Smedley and Aby Garvy (which is where I'm pulling the inspiration for this series):  If you have 5000 photos, using seven photos per layout would create 714 layouts that would take you 1,428 hours to complete at a cost of $3,570 (that's with each layout costing you $5 each).  I'm a scrap-as-many-photos-as-possible creator, but even I know there are bad photos and photos I won't use.  Why clutter my computer, my storage and my mind with more than is truly workable?

If you have a system that's working - great.  There is a system for everyone - from the super simple to the more complicated; it just depends on what level of organization you want.  There are free programs like what comes on your computer to Flickr, PhotoBucket and about any online photo developer like Snapfish or Shutterfly, to pay-for software programs like LightRoom and PhotoShop (I'm sure there are others, but I'm using a free program and am not versed in the pay-for software).  Your system may also be a combination of these - maybe your sort chronologically but you also pull out or print copies to sort by topic.  Again, knowing how you work will help you find the system that works for you.

Finally, it's time to store and/or display your photos.  There are any number of ways:  your traditional photo albums - are they out where they are accessible and viewable?  Maybe you download all your digital images to DVDs/CDs.  With the advent of direct viewing of television programs you can have your digital images rotating on your TV or computer screen.  Do you display random photos in your work space, or maybe you showcase recently finished layouts in your home or work space until they go live permanently in your albums.


How this works for me:

With the advent of Project Life, December Daily, Week in the Life and other more focused projects, intent of the photos taken can be different.  Like my PL photos are random shots:  food I make, screen shot of my latest walk (yes, I'm walking!).  While photos for my traditional albums tend to be event based.

I have no system, or rather I have no process for converting my images to prints - and I really should have one.  My storage system, however, is chronological.  I download the photos off my camera according to the date they're taken.  With the exception of Project Life, or other mini projects, my photos are printed online.  I wait for a sale and upload a group of photos for printing and mark my digital folders that those photos have been uploaded, or uploaded and printed.  I don't complicate my system.  I don't tag.  I don't rename shots.  I don't change the meta data.  The date of the photo is pretty much all I need to sort the printed images into my system.  Once my prints arrive, they are sorted into Cropper Hopper photo keepers by year, month and event.  I use note cards to mark the information and move along.  I used to scrapbook purely chronologically, but now I hop around a bit, though my photos remain in a chronological system.


I have my traditional albums out in the family room, and have gotten into the habit of pulling down baby albums for a particular child when their birthday approaches.  I should probably just pull down a random album for a week or more for people to look at - if they're out, they'll be looked at - otherwise they're in the room but ignored.  I have chosen to take part in the special projects (Project Life, December Daily, etc.) in part, to get current photos out for people to look at.  I want to share all these great memories with the family and friends that wander in and out.

Happy Wednesday,

Tuesday, January 22, 2013

Long Weekends

Long weekends should have as a by-product some serious productivity. . .not a wheel-spinning, negative-outcome in accomplishments.  But that's what this holiday weekend was. . .zero in terms of getting much done.  And not in the good we-were-out-playing ways, but in one of those what-the-heck-did-I-do kinda ways.

We did cap off the holiday weekend yesterday celebrating my sweet hubby's birthday.  He roasted a turkey, which was totally yummy, and I provided the sides and a Pumpkin Gooey Butter Cake for dessert.  We had our usual Monday evening dinner guests, his folks, and his sister and her husband joined in the lively meal.  Now, it's back to school, back to work, back to trying to getting  things done.

Because of my inactivity this weekend, I don't have my Project Life to share this morning, which bums me out in more than just not sharing it - but it will not derail me!  Actually, I never made it to my studio this weekend - the closest I got was to run crap from the kitchen down to the store room. I gazed longingly at the clean-ready-for-work space as I stomped back up the stairs.

But you can start your week being productive.  Even though it's supposed to be almost 70 tomorrow. . .Hello?  My calendar says it's JANUARY!. . .I'm not ready to give up the dream of having some snow. . .a lot of snow would be great.  This color inspiration from Apron Strings' Color Theory Pinterest board makes me think of snow. . .and baking while the fat flakes float past my kitchen windows.


Uh, and to go with a color inspiration, a little practical inspiration provided by Jennifer Halleck using the January Smaller than a Breadbox kit - the Carta Bella line.


Happy Tuesday,

Friday, January 18, 2013

Organize It - Part Three

I've talked a lot about my work process for being creative.  Knowing how you work is important as you purge your way through your space and/or supplies.

Today is about finding out your work flow.  

  • Design First - means some type of design element inspires how you start your work, whether it's a font, a color combo or some other element.
  • Story First - you have your title in mind, maybe you've already written your journaling.  Creating your page is because of the story you're telling.  Everything you select once you know your story, supports its telling.
  • Photos First - it's all about the photo(s).  Your ideas about your layout and journaling come from the photos themselves.
  • Supplies First - the products in your space are all the inspiration you need, whether it's the plaid of a paper or the sparkle of the buttons - you see the product and you know what photos you want to pair them with.
This is where the book comes in handy, because the workbook has a quiz to help you figure out your process.  If you're not sure what your process is sit down to create and just pay attention to how you work.  Are you flipping through your kits first?  Or maybe you have a journal of things your kids said.  If you're always looking for tools for your layouts, you'll know you need to round them up, maybe into a station of sorts, but at the very least keep them out and at hand.  If you never reach for the sketch books but they're lined up on your table, it's either time to pass them on or at least move them behind close doors and make room for something you do need at the ready.

How this works for me:

My approach starts with products.  It's one of the reasons I'll probably always be a paper scrapper; the tactile feel of the supplies.  I love the colors.  The patterns.  The sparkle.  So yeah, products kinda do it for me.  I pick a kit and then pull photos to go with it.  Followed by the design, whether I use sketches or just push stuff around.  For me title and the journaling come last.  Because I know this about how I work, it translates to how I set up my space.  Knowing I need to see my supplies to use them, means that the supplies I use most are sorted (for the most part) by color and are kept where I can see them.  But things like my tools, which aren't as big a deal to my design are stored behind closed doors.

Take some time in your process to figure out how you work so you can set up your space and your supplies to help that process and you'll find your time is spent creating not searching.


Like previous posts in this series the majority of the information is inspired by the book "The Organized and Inspired Scrapbooker"

Happy Friday,

Thursday, January 17, 2013

Inspiration and Energy

I'm glad someone's crafting, because even though my intent has been to do so this week, I can't seem to get myself down to my space.  Last night I fell asleep putting the 4 y.o. to bed, the night before it was helping the 12 y.o. with a paper.  And with the cold, it's just been freezing down there, so I that makes it less appealing.  Today, though, today is my day.  Even if all I get done is adding tiny strips of paper to my One Little Word cards, I'm going down there!

Today's inspiration comes from Kristin Perez using the January Smaller than a Breadbox kit, the Carta Bella papers, which are just yummy.  I just love these colors!!  Her photos, with Santa in red and her girls in the turquoise. . .perfect.


Now, if you're planning to do a little crafting, or maybe you're on that January-high and have decided to tackle your crafting space, you're going to need more than just the will to do so.  You're gonna need some energy.  I made the Chocolate Granola Bars, pictured in the upper left - the original Pin is on the I Can Cook That board on Pinterest.  My version the mini chips are still mini-chips - her version she added the chips when the goo that holds the bars together was still warm, so her chips melted to make a nice glaze.  Either way, they are gooood!!!  So good, you might just find yourself taking more than one "energy boosting break."


Happy Thursday,

Wednesday, January 16, 2013

Organize It - Part Two

The following ideas are inspired by, "The Organized and Inspired Scrapbooker" by Wendy Smedley and Aby Garvy.

Today it's about getting inspired - and not just inspired to purge, sort and clean.  One of the keys to organizing your space in a manner that works for you, and inspires you, is to be intentional about what you bring into your space.  To do that:


Be aware of what inspires you - when you realize what inspires you it will help you choose the photos to work with, the products you are more likely to use and it even helps you get rid of what doesn't inspire you.  Not to mention how it will help direct what you bring into your space.


Gather your inspiration - wrap your inspiration around you like a cozy blanket.  Whether you tack things up on the wall in front of you, use much-loved items within your space or use Pinterest to keep track of your ideas, having them at your fingertips is key.


Pick your organization method - all the ideas in the world won't help if you can't find them.  There are any number of ways to organize - it's what works for you.  It may be more than one thing that works and it may also take some re-doing to iron out what isn't working.  These are just a couple ways to think about it:  
  • Organize Randomly, just having your inspiring ideas grouped together - this is not the "pile" method, but rather a loosely organized system - think ideas pinned to your wall or maybe it's several baskets lined up on your desk holding various ideas. 
  • Organize by Category like by color or techniques or tips.  
  • Organize by Project by collecting all your ideas for any project into one place.


Store and display your ideas - here is where knowing your working style will help you with your purchases - your intentional purchases.  If you have to see everything - looking for great containers that hold your items while being able to see them and then group them nicely within your work space (this works even if your works pace is the kitchen table.)  Gathering items that have meaning into your space will continue to inspire (and decorate) your space.  If they happen to be containers, all the better.

Inspiring storage could be:
  • Vintage or handed-down dishes, bowls, baskets or other containers that double as decor and are great for holding items.
  • Books, binders and magazine holders allow for corralled, but easily accessible storage of ideas torn from books, sketches, notes on ideas, print-out from classes or blogged techniques to try.
  • Jump rings are an inexpensive way to hold ideas for layouts, sketches, tips, techniques, or, if you are a closed-not-visible kinda storage person, supplies that are stored behind closed doors (paint, stamps, dies, etc)  Just sort out accordingly and bundle on to a jump ring and string up the rings.
  • These days - Pinterest - is just a click away.  Shoot set it to be your homepage when you turn on your computer for quick inspiration.  It's a great place to look for ideas you haven't even thought of but will know it fits when you see it. 

How this works for me:

I know from reading through the book, the questionnaire and years of working with myself through several incarnations of my space that am a "Closed and Visible" kind of person. This means I like the neat and tidy look of seeing my supplies but with lids to keep things in check.  Containers without lids don't work for me - it feels clutter-y.  If I can't see it, I'll more than likely forget I have it - case in point, my stamps which are stored behind closed doors.  I also know that books and binders to keep track of things I can't see doesn't help.  I'm not a tear-er-outer of ideas.  I've torn and the pile never gets flipped through, it just clutters my work space and in the end they get tossed.  Pinterest has been my virtual "tearing out" that totally works.  I have recently discovered I love the farmhouse/cottage look.  I like items from the 30's, 40's and 50's.  I love colors, which makes it hard to narrow down on using them in my space.  On the other hand knowing this has helped me when it comes to storing my supplies.  Because I think by color, I know that sorting a large portion of my supplies by color works for me.

Take some time to think about what inspires you, how you think and what you currently have in your space that either works or inhibits your work.  If you're feeling totally lost as to what you like or your style, surf a little on Pinterest, even if ultimately you don't use it.  Start with Apron Strings' Board Studio Spaces.  Next use the search field with key words like "craft storage," "craft spaces," or "scrapbook spaces."  Just pin what appeals to you, don't think too much about it.  Then go back to your board(s) and you'll start to notice patterns.  Colors that appeal, or styles you lean toward.  Even storage ideas, or at least a method to start with and see if it works.  You'll also see things you don't like, try to identify what it is.  Like maybe you love the storage cubes, but all the paper is just stacked and it looks messy to you - hint, you might be a Closed and Visible, or Closed and Not Visible kinda gal.  (Read Part One if you missed it.)

Happy Wednesday,

Tuesday, January 15, 2013

Stinkin' Cold

Today marks the 7th day, that I've counted, that I have been working with frozen, chapped hands and toes that are more icicle than flesh. It's flippin' cold.  Frigid.  Ice-land-o-wonder.  Today our high will be a whopping 32 degrees!  Up ten degrees from yesterday.  Well break out the shorts and call me hot.  Not!  If it's this cold, I want to see snow, not frozen brown grass.  I took my "deep-sigh moment" for snow by gazing at the mountains this morning during my drive to drop of my high schooler, hoping my seat warmer did its job quickly.  The foothills, just a stone's (a frozen stone) throw from our home are pretty devoid of white themselves.  The hills just behind them have a dusting that's settled into the cracks and creases.  But the peaks behind those are slathered in white.  Ahhhh. . .better.

I try to think cozy, warm thoughts while crafting.  I'll be doing that later today when I challenge myself to create cards.  Today, challenge yourself to create using this color inspiration from Design-Seeds via Apron Strings' Color Theory Pinterest board.


Uh, and look at this, the color combo above can be found in January's Bigger than a Breadbox kit.  How 'bout that!  Among her other layouts, Maria Swiatkowski is participating in Project Life and used her Little Yellow Bicycle papers to create three pages for her Project Life album.  Here she's using a simple 2-up format, so she knows exactly how big to make her cards and photos; measure and cut and she's done.  On the layout here, she's also included a little embellishment found in the Studio Calico Wood Veneer Camera.  It needs nothing else and she's her first week.  Go Maria!!

Happy Tuesday,


Monday, January 14, 2013

Project Life - Week 2

I had a semi-productive weekend.  It's was freeze-snot cold and nothing good would come from being out.  So I stayed in.  Broncos lost.  Packers lost.  Only thing worth watching in the SuperBowl now is the commercials.  I perused my perpetual cleaning calendar and did the first two weeks of projects. . .though projects sounds big - tasks.  First two week's of tasks; things like cleaning the top of the kitchen cabinets - GROSS!  Cleaning the top shelf of one cabinet, which led to cleaning the top shelves of all the cabinets.  Cleaned out and reorganized the junk drawer, which lead to the battery/charger drawer getting a cleaning out.  Cleaned off and out the nightstand in our room.  Lots of little things that nobody but me is gonna really notice.  In between that I got January kits up and out the door - they now stand shivering on the front porch, waiting for an unhappy-to-have-to-get-out-of-his-warm-truck mailman.

And I produced Week 2 of Project Life.  And we won't talk about how I started the layout at 12:30 AM!  Sorry for the early-morning-sun-glare on the left side, but you get the gist.  I played with it longer than I should have, but it's done.  I used a kit from January '12.  I think it was 2012, might be 2011.  Either way it was a kit.  I have the scraps laying on my table and will be making a card or two, and using stamps - hello, Use Every Stamp FREE class (she's also set up a blog for the project) and probably a sketch from my 28 Cards in 28 Days class from Big Picture last year.


While shuffling my photos around last night, I was mulling over both my approach and several things I had read about Project Life.  If you are undertaking the project this year, I'd love to follow along with your progress - leave a link in the comments.  If you are thinking, but still haven't taken the leap, here are some thoughts (these thoughts are not entirely my own and come from blog posts I read last week:  Lessons from a Year on Document Life Workshop and How Failing Last Year):

  1. Don't do more than necessary.  It's supposed to be an easy way of documenting the everyday.  Get a kit - there are plenty geared toward the project.  Having done the pocket pages, they are a total no brainer!  And after last night's longer-than-I-wanted-to spend layout, I'm rethinking the pocket pages a little more.  I'll still be using Apron Strings kits to make it go that much faster, but I need to see what options Doodlebug has for their pages.
  2. Don't get intimidated by others.  Scrapbookers seem to have this issue as it is.  Everyone does what works for them.  I'm not spending time on these pages.  Simple, clean and done is the goal.  This is definitely a project that needs to work for you in order for you to be successful.  If you start feeling inadequate looking at other examples, then for heaven's sake stop looking!
  3. "Life got in the way" excuse for dropping the project.  I used it myself in 2009 - "summer break broke my routine."  One of the bloggers above mentioned LIFE is what this project is about, she should have be documenting it.
  4. Document first, decorate later.  If you're doing pocket pages, get those photos and any notes or memorabilia in the pockets FIRST.  If you have blank pockets, slip in some patterned paper and call it done.  You always have the option to go back and add numbers, letters, glitter, buttons . . . whatever to decorate the pages.  If you're doing traditional layouts - again, get the photos and words down - add the goodies after that.  If you get mired in the "it's got to be decorated" details go re-read #3!
  5. This is not a lesson in perfection.  This project is down and dirty.  Documenting the everyday - the things we may take a photo or two of, but don't do the layouts because we only have a photo or two.  Grammar, spelling, empty spaces, dark photos, blurry photos, an entire week skipped because you were sick - don't sweat it.  Who cares!  Just move forward.  I'd have loved to see a book (or 10) like this produced by my mother, or heck, my grandmothers.  Seeing snippets of their everyday lives would be amazing!  I wouldn't give a crap if the photos had heads chopped off and misspellings - it'd be amazing!
  6. This is not a project that needs cohesiveness.  Am I worrying about having two traditional layouts and the possibility of adding in pocket pages?  No.  Am I thinking about making sure all my papers and cards and whatever are coordinating.  NO!  This project, for me, is about using my stash and getting photos up on the coffee table we can enjoy THIS YEAR!  However, there is something to be said for repetition.  The same layout, the same size photos, the same routine in producing the pages, shoot even taking some of the same photos throughout the year.    If it's been working, nobody's telling you to stop.  BUT, if you've lost the loving feeling for the way your producing your project (and it's affecting your completion of the projects) DO NOT be afraid to switch it up. . .re-read the first sentence of #6 if you are in doubt.
  7. Don't Give Up!  You will get bored.  You will feel like not doing it.  You will find excuse after excuse to stop.  You will look ahead at 50 more weeks and get overwhelmed.  DON'T.  Some weeks you'll be energized.  Some not so much.  And some, you'd just rather not.  DON'T STOP.  Change up your page style.  Challenge yourself to do something different.  Find your groove again.  BUT DON'T STOP (have I said this enough?)  Because when you overcome the "I want to stop" and you come to the end of the 52nd week, you are going to feel awesome.  And you'll have your family's year in your hands - misspellings and all!
Happy Monday!


Friday, January 11, 2013

December Daily and Tacos

Thank you all for your posts in regards to the "episode" the other night.  Kindred spirits, a couple chuckles and shared similar moments . . . and the lack of photographic evidence is what I loved.  Oh, and I did get a photo of the soggy towels. :D  Barbara, when I read about your poor Poinsettia, I could totally see it happening!

Last Saturday I took to Archiver's a number of projects to work on instead of doing traditional layouts.  You've seen the One Little Word cards. . .which I'm hoping the weekend will give me time to finish.  I also did my Week 1 of Project Life and need to print out my photos for this week.  I took my Take Twelve, with three month's worth of photos, but didn't do anything on it.  I also dragged along my December Daily 2012.  I got all my photos printed before heading out and sorted through the October Afternoon kit I purchased for the project.  I love kits for their no-brainer approach.  After fingering all the pieces and I'm still not sure what my approach will be, but here is Day 1. . .30 to go, but at one photo a piece it should come together quickly.


In an effort to get through some of my Pinned recipes, I thought I'd share some that I've made and, hey, if they happen to be time savers so you can enjoy scrappy/crafty time, well then darn it, so be it.  


I'm no vegan, not even close, and like the blogger who posted this recipe, I love my meat and dairy products.  But given that a 2013 goal is to lose a smidge of weight, and with that comes some smarter food choices, I figured why not.  Plus, it's a taco!  With my family, if you throw whatever in a taco shell, they're more likely to eat it.  And so I forged ahead with these Bean and Quinoa Tacos from Budget Bytes.  We've been eaters of quinoa for sometime, though usually as a side dish.  I had never seen the tip of rinsing the grain before cooking it - it made a difference and will be interesting to see how it improves the flavor when I serve it as a side again. This is a totally great make-ahead recipe - toss it together in the morning, warm it up, set it out and head off to your crop with the girlies, or down to bury yourself in your crafty space.  It's flavorful, the pico de gallo is fresh, and really, we didn't miss the meat.  Though, holy cow, when you're counting calories, who knew corn tortilla would be a cause of concern!  Shoot.  My avocados were just a touch past ripe and so I opted to make guacamole instead of just serving slices, and in my guacamole it's just avocado, lime juice and a little salt.  I thought the family would miss the lettuce, and more importantly, the cheese, but nobody asked and nobody made a dash to the fridge to get any.  I did try sour cream but found I liked just the guacamole.  

Have plans this weekend for a little "you" time.  Try this quick, easy and healthy dish.

It's very orange here in Denver.   Apparently the Broncos are in some sort of playoff.  Both boys had an orange and blue out of uniform day.  Even the mailman was showing his colors!  It's supposed to be frigid (which canceled the soccer practice scheduled for Saturday), so my plan is to stay inside as much as possible and continue to de-Christmas the house.  And I'm really hoping to be crafty!!

Happy Friday.

Thursday, January 10, 2013

A Story and Inspiration

So you know what's fun.  Heading up the stairs to get your four year old into the shower and he dashes down the hall to get his towel and comes out of the bathroom talking about someone not cleaning up from their bath.  Not a shocker. . .the kids' bathroom is generally under a constant state of disaster...one of the banes in our household.  

As can happen at the end of a long day, I'm not really paying attention to what he's saying so much as I'm noticing, with a big sigh, he's not doing what I asked - going to our bathroom for his shower.  I go down the hall to moosh him along and he's still talking about someone making a mess. Ya-ya I mumble, it's always a mess, a remark in an off-the-cuff-let's-get-a-move-on way.  Until I see the puddle by the door, reflected in the light from the hall.  Seriously, I think.  What? . . . I flip on the light expecting to see someone's water bottle had fallen over and lost its contents on the floor.  Nope.  

You know those moments of "dawning" as you really start to see what's going one?  I follow the puddle along the baseboard of the cupboard, while looking at the counter above - a mess?  Totally.  Wet?  Not so much.  The rugs, I begin to notice, are wet on the floor, too.  My gaze follows the water signs along the floor toward the tub and toilet.  Larger puddles.  More water.  What the. . .?????  

My first thought was the toilet had sprung a leak, because I can see the water dripping from somewhere . . . around it, on it, in it, I can't tell.  A closer look finds that it is overflowing from the bowl.  Much cussing ensues as I grab all the towels from the racks and fling them to the floor while yelling. My yelling usually is ignored, but today it draws attention and the boys come up.  Why is it your kids are the most dense when you need them to think??   Get more towels, I yell, to people who look back at me like I'm speaking some foreign language while sprouting something out the top of my head.  Someone finally moves.  I find the source of the problem, and begin fixing it while asking the, "who did this," to which, naturally, nobody knows.  

In the end I lost 30 minutes to clean-up and the ceiling above the bathroom is being watched for signs of water, since I have no idea how long the water was running in there.  But I do have a clean bathroom floor.  Did I take a picture of it for my Project Life week?  No!  Will this post show up on the layout?  Yes.  Maybe with a shot of the pile of wet towels still in a soggy lump on the laundry room floor.


What I wanted to do was work on something creative.  What I ended up doing was necessary, but alas not as much fun.  I want you to have fun today, instead of looking at a pile of water-logged towels, so go create something and use this color scheme as your inspiration, found on Apron Strings' Pinterest board - Color Theory.  I love the photo, and the colors.  So pretty.  So serene.

Serenity NOW!

Happy Thursday.